Sunday, December 28, 2008

Un-Enrollment


I'm planning a large scale woodblock print about the longevity of the Horseshoe Crab and I needed to educate myself about a few things including Trilobites. One thing I learned is that Trilobites (a long extinct race of sea creatures that flourished during the Cambrian and Ordovician time periods) practice what is called "enrollment" when threatened. They tuck most of their bodies up under their shelly shield-like heads and wait until they can safely unroll again. There are even matching grooves in their exoskeletons where their front and back ends can lock together like a jigsaw puzzle.
The point is I hate the camera. I avoid getting my picture taken when I can. I had a woodblock printing demonstration for my art center's open house and my husband took photos. I guess I will unroll now and put pictures of myself on the internet. It was a lot of fun and people seemed to like seeing the prints come off of the blocks. It's nice to share that moment and see complete strangers share the excitement that you experience in the studio when pulling prints. I normally don't print Moku Hanga style on my Pilot Press table but it was right in front of the door and I wanted people to have a straight shot glance from the door that something cool was going on in Studio Zero! Kids really enjoyed the process and I wish I could teach the block printing to that age level but knives and kids don't mix. Anyway, a good time was had by all and the weather was nice. I just love the light that spills into my studio through those windows!


Sunday, December 14, 2008

The familiar taste of Crow


Well, as I recall, I was going to letterpress in the title of the "Diospyros Virginiana Quatrefoil" as I was not going to right it 50 or 60 times. I have a beautiful set of type I purchased from NA Graphics called Franciscan that I have never used and now was the time to play with it....until I realized I was spacing material poor. I didn't have a scrap of 16 point spacing material to save my life and there was no money for a set (which probably goes for about 100.00 now). I'll just have to rub my pennies together for another day. So, I sat down at the table and began the editing process and it turns out that I only had to write "Diospyros Virginiana Quatrefoil" 30 times. Sadly, only 30 made it from 50 sheets of paper because I was paying more attention to people walking around the studio and asking questions than the edition printing. No matter, I will recycle them in some sort of creative way. There were some cute kids that came and went throughout the day and one of them even dug a reject print out of my paper recycling and said "Can I have this? I could draw on it or something." I told him that he should just go right on ahead and that that was a very good idea. I will post another blog entry of photos from the demonstration just as soon as I can get the nerve up to look at photos of myself. Man, I hate the camera. :)
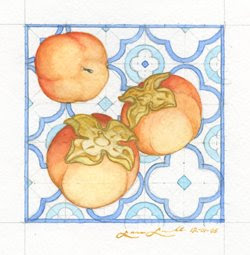
Here is a comparison photo of the persimmons painting versus the persimmons print.

Wednesday, December 10, 2008

Ready for the last block!


Well, it has taken me three days to get to this point and now I will rest! I am leaving the final key block (brown outline of the persimmons) for my demonstration on Saturday. Not much is left to the imagination at this point though and these are intriguing without the outline but I'm hoping the outline with "seal the deal so to speak". Hopefully, I can print the titles for these on Sunday but that is if all goes well. This past Saturday I only had time for one impression although I had intended on doing three. In the middle of printing, I got a phone call from my brother in-law asking me if I would attend his wife's birthday party that night. Well, I very well couldn't miss that. She is carrying triplets and you have to give it up for a lady that can do that!
The first impression was a wash made of nori and a golden yellow. It was pale just like the under wash of the painting.

On Sunday, I started the first bokashi again with the golden yellow wash (which was barely noticeable, bleh). For reasons I can't remember, I then printed the light blue parts of the geometric background. I think the light colored shapes were messing with my head and I needed the blue to feel more grounded. After I printed the light brown colored calyx, I called it a night. I had carved little highlight dots in the calyx block to give some contrast. They were very tiny and I knew they would be hard to print. Some came out and some did not but it really didn't matter to me. My paper was still wet when I left on Sunday night and I stayed home on monday but I had turned the thermostat back in my studio so that it would remain cool. I don't worry about mold taking place in the winter but paper disintegration was another matter all together. But when I returned on Tuesday all was well. I think I had sixty some sheets of paper printed up and I started out looking at them like "Ugh, my back is killing me but here we go."

I printed the golden yellow bokashi and then a strong orange and the fruits really started to glow off the page. It was a wonderful experience! Another bokashi of burnt orange and the cobalt geometric background and I have reached the point that is pictured above. I could barely feel my legs and tail bone after that though. My studio is entirely on concrete and I had to stretch constantly while printing to keep my joints from fusing. I recommend Sam & Dave or Aretha Franklin to set the speed! Now, I know someone is just dying to point out that I need to make one of those nifty little tables to print at and I will not deny that it is on my wish list but 1. I need sharpening stones before that 2. there is no more room left in my studio and lastly and chiefly 3. my clutch gave out in my '98 Honda so ain't nobody gett'n nuth'n for christmas this year.

Saturday, December 6, 2008

More development as the Persimmon readies for its debut!


Ah, winter. How you mock me! The benefit to having a studio in the basement is that it is nice and cool in the summer time...which means I freeze my butt off in the winter. Often, my hands get chapped and I have lotion nearby but sometimes I can't feel wether or not my hands are too oily in the cold. So when I went to peel the pasted registration prints from the color blocks it became apparent that yeah, my hands were still greasy. Luckily, the masa didn't put up too much of a fight and the oiled part of the block happened to be a spot that was going to get chipped out anyway.

Here are all the blocks to be used in this print. The dark one with the chips of veneer that remain is going to be the light blue quatrefoil pattern. This one gave me fits. The wood under the veneer (it was 3-ply Shina) was very splintery so when I went to clear out an area near one of the diamonds part of the grain that ran underneath a print area came right out. Much cursing ensued but Mr. Wood Glue bottle saved the day. Yay! My hero! I am very proud of the dark blue area block that you can see below.

I am madly in love with Islamic art and architecture and the geometric patterns are reminiscent and the carve marks resemble muquarnas. Look up muquarnas. They rock heavy.

Even though I loath doing it for someone else, I love framing my own work. I hate frame making, and mat cutting, and I won't go within 6 miles of glass cutting but give me all those elements prefab and I will go to town. I framed the Diospyros Virginiana Quatrefoil painting and have it near during the printing of the Diospyros Virginiana Quatrefoil edition for color reference. I already know what I'm getting into with the title. There is no way in hell I'm writing that title out 50+ times in addition to signing and numbering. That's why mama has a letterpress! :)

The first color I'm doing is a very light golden orange. It came out more yellow but when I checked the painting that's what I had painted anyway. The bokashi will dominate everything anyway so I'm not too worried. Here they are hanging out in their little trash bag nest. I was originally going to save the last two blocks for the demo but I think I'll just do one because it's taking longer than I thought. I will be retaining one of each stage in printing anyway. I am planning on arranging them in consecutive order and framing them so that when people visit they will have a visual and I won't have to look like such a dingbat explaining it all. And now for a dark moment.......noting the glazed look people get when I explain it anyway I don't think they care. Ah "empty-pocketed-artist-cynicism", can you smell it? My studio is starting to positively wreak of it. That's when I whip out my handy aerosol "smile-and-act-like-you-don't-want-to-choke-the-people-who-show-up-every-first-friday-without-fail-and-drink-up-all-the-wine-and-eat-up-all-the-food-that-the-artists-have-to-pay-out-of-pocket-for-and-then-leave-without-buying-so-much-as-a-three-dollar-card"

There.

I said it.

Monday, December 1, 2008

What got into me?


I have NO IDEA!!!! But I like it!! After two weeks of fussing around with the fig stuff I'm blowing through work on the persimmon! This is the original sketch all painted up! Now it really looks like stained glass. I might revisit this effect as it's rater fun. The "stained glass" lines (measurements lines) will not show up in the print and I wonder if that will detract but I'm not concerned at the moment.

Just wanted to share the image of my desktop. Note the funny little pan of dimples with color. This turned out to be a great color pallet that is very convenient too. It was used as packing for something about a year ago when my husband bought computer supplies. It wasn't recyclable and I hate to continue to accrue things I don't need but his came very in handy. After I finished the painting I was able to pull some proofs of the persimmon block to make color blocks.

I left my bokuju ink at the studio and had some thinner sumi ink instead. I had a bad experience once with a bottle of indian ink I did all but weld the top onto but it bleed everywhere into my bag anyway during transit. If ink was to be spilled, I didn't want it to be my bokuju! This stuff was a lot runnier and the initial prints show it but after warming the block up a little and letting the paper air out a little things tightened up. Here is the proof of the persimmon. Tomorrow is color block carving day!!

Know thy self


Words to live by....so my figs painting burnt me out. Not that I may not come back to it but it makes me sick to look at it for the moment.
Last year I had an open house at the McGuffey Art Center with all sorts of food and wine and it was fun while it lasted. Less to participate in McGuffey's annual open house, it was more of an opportunity for family and friends to come see my new studio. After it was all over and I was scrubbing punch and candy off the floor, I thought to myself that I would not be doing this again next year. Haha. So, I will be participating in McGuffey's open house but instead of having food I will be displaying all my artworks and hopping to jazz the place up (as much as possible anyways) to look like a small gallery. I will be doing a Japanese Woodblock Printing demo from 12:00 pm to 2:00 pm. People usually don't know anything about printmaking and this would definitely be a treat for them to see what Moku Hanga entails.
I subscribe to a few magazines because I enjoy their aesthetic for the most part. Two of my favorites are Country Living and Domino and one of them recently featured an article on persimmons that focused on a local industry here in Nelson County, VA called Edible Landscaping. Trouble is I can't remember which one. At any rate, the graphics done for the article were beautiful and they shot some asian persimmons resting on some geometric textiles. I was struck by the beauty of the calyx on the fruit. The leafy area around the stem of a fruit is usually not noteworthy but the beautiful wooden flower that rims the persimmon is quite attractive. Because we have a indigenous species of persimmon here in Virginia and because I am in love with Islamic art and architecture, I thought this would be a perfect print for the opening. It was until I lost the article.
Confident that I needed the article in order to complete my "perfect" design, I set the project aside and set about designing a new print. I wanted to illustrate to people that for Moku Hanga the completed image (painting) comes first. (Know thy self!) This was not my process so of course I got bored with my fig FAST! For me, unless I really need to know what is going down for registration, I normally sketch something then carve it and figure out the colors later. I usually do paintings as a way to get instant gratification and to relax. I normally do not get the urge to make a print run for a painting. In fact, for the Book of Life project, I am making some paintings as a tool for color block orientation. So the intention of a print is driving the creation of a painting not vice versa. While taking yet another break from from painting the blasted fig, I leafed through one of my Domino magazines and an article on quatrefoils popped up. My mind was made up at that moment that I was going to do a persimmon print come hell or high water!

With the help of Google I found some native virginia persimmons to sketch and sat down with a ruler and compass and fiddled around with some geometrical designs. I whipped it into my scanner, flipped it backwards in photoshop, viola! I carved the persimmon key yesterday. There will be five blocks and one or two bokashi on the fruit. Today I'm waiting for some mulberry to soak up water to pull the registration proofs for colors. I don't have the heart to erase my measure marks. They look like stained glass so I think I will leave them.

Okay, so as always there is a danger of cutting oneself but I must admit I take a little pride in this one. I have a large shallow U-gouge I use for clearing that I had bought from McClain's a few years back. There is a metal ferrule at the end for a mallet but my block was so small and made of shina I figured I could just push it through. It was like putting a hot knife in butter! At one point, I had the knife in the wood with one hand and I stopped to pull my shirt collar out. As I held the knife forward, I drew my hand back to grab my collar and my finger slid over the top corner of the knife. I didn't feel any pain but as I continued to carve my finger started to itch. I checked and sure enough I had accidentally cut myself. No biggie but I am proud that after years of care my blade is still surgically sharp!

Monday, November 24, 2008

Holiday Figs


So, I need to have a piece to print for the Holiday Open House at the McGuffey Art Center when my demonstration goes down in Studio Zero at 12:00 pm to 2:00 pm on December 13th. If this isn't ready then I'll drag out an old woodblock but I like to have something fresh going on. This has got to be one of the worst scans I've done but this is the design for a piece called "Figs" that I want to print. I stopped at this point because I broke one of my cardinal rules and that is not to do any color work at night because my cones have just about had it. I'm not too worried about it though because I started painting when the sun was up and haven't wandered very far in my pallet. The image is about 3.75" X 3.75". After about 4 hours of painting, I have completed a few leaves and two fruit. Sad isn't it? Actually, I'm not sure those two fruit are in the final stages but that is where I will leave them until tomorrow. At any rate, all this insane Vermeer style painting is not going to be reflected in the print. That is not my goal with this print but it will illustrate the differences between painting and print and how both are beautiful in their own right. I could do a photo-intense print with all sorts of bokashi and such but 1. I need to get to gett'n on my New Years exchange designs and my July show work and 2. there is no way that would be ready in time for the demo! Can't wait to finish the painting though..... maybe in sixty years with my 3 haired brush...... maybe I should be committed!

Thursday, November 20, 2008

McGuffey Holiday Open House!


On December 13, 2008, the McGuffey Art Center will be having a Holiday Open House from 10:00am until 4:00pm! There will be open studios, activities for the kids, light refreshments, demonstrations, loads of handmade gifts in the gift store, and the entire building is plastered with wonderful works of art from our McGuffey Member Artists! I will be hosting an open studio with tons of my work available from everything to stocking stuffers to one of a kind artist books and paintings. Come see the cut tree books in person! It's like walking through a snowy forest! I will also be demonstrating the process of Japanese Woodblock Printing in the afternoon. Come on down and enjoy the holiday fun!

Tuesday, November 18, 2008

Farm People in Ink


Well, the print came out well but the journey there was hell. In shopping around, I decided to support Graphic Chemical as opposed to just an "art" store. What I'm about to say will amount to a fluke in production that is not related Graphic Chemical as a company, rather, shame on Speedball. I transferred a few of my drawings onto lino-blocks and began cutting away at the work horse one. While carving, I began to get a funny sensation when I carved in certain areas. It didn't take long before I would start to hear a fibrous pulling sound when revisiting these areas. I stopped carving and held my block up to eye level so I could see the sides. Sure enough, there were little dark gaps riddling the burlap layer around the entire perimeter of the block. I tugged at the sides and both ends of linoleum popped up from the block. The middle remained somewhat fixed to the block but in hind site I should have pulled the whole thing off. I was afraid to at the time because I wasn't sure I could get it registered on the block right. Apparently, there was too little glue laid down to adhere the linoleum to the wood. In some places, there was simply none. I slathered the ends with wood glue and let it rest under some books for a day before I resumed carving.
My original intent was to use these sets of blocks to print on the blank sides of envelopes. Why oh why did I ever come up with that idea. Trying to set that up on the pilot was a nightmare. (Anyone who has ever run a platen press will tell you that they hate broad areas of pigment and they hate multiple layers of opposing paper.... like envelopes.) Anytime I would go to print the layers would hazily read through the image. I had three options: 1. unfold a few hundred envelopes, print, then re-glue 2. adhere tiny registration tabs to a few hundred envelopes and then run them through my hand roll Vandy 3. abandon the project for the moment and just do a straight collectible print edition. Option 3 was looking better and better since unfolding and re-gluing a few hundred envelopes was hardly worth 1.50 an envelope and I'm not even going to address hand rolling and registration tabs on that one. In the end, a lot of sweet talk to the Pilot press yielded my Work Horse in print. And, boy, did he make me work for it. Now I'm going to go enjoy a nice hot cup of cocoa with creme de menthe.

Sunday, November 2, 2008

More Farm People!


I have to say that this project is so much fun! I try to spend as little time on it as I am engrossed in the Book of Life project but it is such a treat to render these creatures and a great way to blow off steam. I do have to reference photos for animal conformation and I just love period clothing from the twenties and thirties. In my undergrad years at the Corcoran, we had a professor that did hours at a local library. Amazingly, there was a lot of turn over in their stacks. She would bring in boxes and boxes of books that were not popular or damaged. I got quite a few priceless books from those piles. One of them that I have been using for reference for period clothing is titled "A True Likeness (The Black South of Richard Samuel Roberts: 1920-1936)." There are such a diversity of images in that book. One page is a couple decked out in lavish furs and suits, another is a baby in a wash basin, another would be a family of share croppers, another might be a death portrait. It's a great book to check out.
This project is not only rewarding because I get to decide which animals and breeds I will be doing but it's also fun to decide what they will wear! This dapper gentleman has a watch fob because I figured that nothing would be more attractive to a chicken than a sparkly watch fob and spectacle chain. I love how his saddle feathers drape over his folded "arm".

I wanted the bull to look sharp and snappy for obvious reasons that he is the "ruler" of the farm. There is a reason that every farmer tells you not to "mess with the bull." The problem I've run into is that other than his spats, your can't really tell he has on period clothing. There is not enough room on my block for a fedora. This brings me to the conclusion that they must've gotten it spot on in the twenties if a snappy men's suit hasn't changed much since then! I'm curious to see how it will turn out because I want his suit to be a dark pin stripe with a white tie. It will be an Angus (black) bull so I hope the image won't turn out too dark. I'm not that worried.

There was a lot of unconscious imagery going on in the broodie hen image. Halfway through drawing it I realized that I was referencing my grandmother for the imagery. As a good southern family, we went to church every Sunday when I was growing up and my sister and I had to ALWAYS wear a slip or petticoat. Kids don't care about their appearance and my grandmother or mother was always tugging at our skirts hissing "Your petticoat is showing!" In her later years, we always teased our grandmother about that when her skirt was accidentally hitched up. I hated those damn things. Anyway, there were three of us kids and she was always scolding and clucking after us like a broodie hen.....a smoking, swearing broodie hen. Ah, the south! A petticoat under the hen's scalloped dress would have been too repetitious so I dressed her up in pantaloons. Believe it or not, some people still wore those things in the 80's. Not my grandma. Those are definitely her legs though because she always wore shoes like that.

Lastly, I cracked up the whole time I was drawing this one. Surprisingly, it was hard to find good swine images through Google Images. I was looking for the old fashioned images you used to find of hogs with folds in their faces and their ears flopping over. Mostly what I was finding were images of industry standard pigs. I didn't realize that different breeds were bred for certain things like bacon vs. ham. All you vegetarians out there cover your ears. People don't realize the danger of picking only one breed of animal to provide the world's meat and risking inbreeding and genetic degeneration. I'll go off on that tangent later. Not only was their a lack of diversity but there were also images mixed in under titles that were not what I was looking for. "Fat hog face" search brought up more images of human women than pigs.....anyways. I scraped a few (two) images off the internet and went on memory. An interesting thing I found out in making my fat hog look more piggish is that I didn't realize that the animal had such an upturned jaw. This got more pronounced as it gained weight and shoved folds of fat onto its face. The belly with the cinched pants button was not hard to draw. You see a lot of that in America and I admit I've been there myself. My big old fatty-fat piggy was hilarious to draw!
I can't wait to do more!

Sunday, October 26, 2008

Baren Wrapping


Initially, I thought this was going to be a blog about how to avoid everything I did wrong but I don't think my first try at rewrapping my baren came out all that bad! As you can see in the image above, my baren was WAY overdue for rewrapping. The knots that were most prominent wore through the takenokawa sheath first. I really should have worked to replace the sheath sooner (it was 3 years old after all!) but laziness and procrastination took me over. At any rate, I promised myself that I could not pull the first proof for the Book of Life until I had replaced the sheath. If my reading was correct, I theorized, I could flip any damaged areas of the shin over as it should be loose inside the backing disk.
I purchased 3 replacement sheaths from our dear friends McClain's Printmaking Supply. I wanted 3 in case I screwed the first one up badly. As I carefully unfolded the shipping packaging, 3 crisp flattened takenokawa stared up at me. Now, I must say that I am a religious person but I do not attend church. When you attend church anyway, the first thing the preacher, priest, monk, or witchdoctor will tell you is that God wants you to find spirituality in the everyday. For me, printmaking can offer this up in many way. I touched the surfaces of the sheaths and was blessed by the reality that something so fragile and thin has the ability to lay under the constant pressure of elbow grease and be abraded against a block of wood for at least three years before finally wearing thin. The other epiphany for me was the size of the sheaths. We have red bamboo in our back yard and it often sheds minute sheaths that are about 3 to 4 inches long. I am supposing that the plant that shed these sheaths was very old indeed. I had a soft old piece of fabric from a ripped t-shirt that I wrapped a single sheath in after I misted it with water.

Up front, I own a Murasaki Baren and there is a universe of difference between it and the standard 7.00 baren. Think Pinto vs. Rolls Royce. I can only imagine what a Hon Baren must be like. This being said, when I (painfully) unwrapped my baren I was horrified to find that the shin was GLUED to the back of the ategawa! Someone has hobbled my baren! Well, gone were any hopes of mine to flip the shin if there was fiber damage. I'm positive there must have been fraying at some point but when I run out of traditional ategami paper I use deli wax paper and the wax must've sealed the frays shut. The crack you see in the old sheath was created when I took it off and it resisted taking any other shape other than the one it had dried and molded itself too. I HATED taking the old sheath off because the original wrapping was so elegant and graceful and I knew mine would be rude. I kept the old sheath though so that I might learn from it. I have to note that the inside of the sheath was soft and you could see where the knots in the shin made their indentions.
Preparing the takenokawa was also a very spiritual experience. I am in the basement of the art center and sometimes I got a whole day without seeing another soul. It was very quiet and I could go about my work as I please without much disturbance. I enjoy visitors but preparing a bamboo sheath is not something Charlottesvillians do everyday. To soften the sheath enough to be manipulated into shape you must use your own breath to raise its humidity and temperature. When wet, the takenokawa will curl back up into its original shape and you wrap a damp cloth with it and then blow into the root end until you have heated the entire cloth bundle with your breath. I rinsed my mouth out with water well before I started this. God knows I didn't want a peanut butter and jelly smelling baren for the next few years. So, I paced around my studio blowing into this little damp tube of cloth that looked like a giant dark blue joint. Printmaking really roots me with my heritage I feel because being brought up in the country, we're really a lot of do-it-yourself-ers and there is real value in knowing an learning a craft. If you take the easy way out in sheath softening, (with a blow dryer) you end up with a soggy sheath that will tear like a wet cracker. If you do not take the time to dampen it correctly, it will tear because it is too dry. Breathing life back into the sheath from the root end feels like shamanism because you are breathing your own breath back into it and reanimating the being so that it will work with you if you take the time and patience. Finally, after a bit of pacing and breathing, my takenokawa had come back to life!
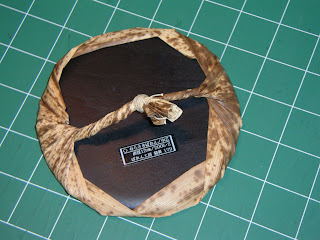
I was amazed at how tough the thin plant was as I made my folds and it didn't crack and twisted the handle end as hard as I could and it did not fray. Alas, I did not achieve delicate folds like the master that wrapped my original Murasaki takenokawa but I had wrapped it and I had not wasted a valuable takenokawa! I was rewarded even more when I returned to the studio the next day and the baren had dried and shrunk even tighter! Now I am ready for printing the first proof for the Book of Life!

Tuesday, October 21, 2008

Rain Soaked Mountains


I'm so close to finishing the first key block for the first page in the Book of Life I can almost taste it! I'm frustrated with my camera as a took full shots of the block and the auto focus was just not kicking in. The resulting images were just blurry. I settled for this close up. At least the new carving came out in the shot. Pretty much everything is done for this key block except the border. I remeasured the borders with calipers because I want to stay as close as possible to my original perimeters.
I decided that rather than draw teeny tiny water molecules around the border (the creep of the graphite transfer paper wouldn't catch all the detail anyway with any accuracy) I would cut out a rubber stamp and stamp the designs where I needed them. All the best laid plans, right? Yeah, number one, in an effort to quit obsessing and start doing I settled with this molecule design to begin with. Number two, the rubber will hold no more detail at the current size and I don't feel like burning out my retinas to create a smaller stamp and THEN have to do it fifty MORE times in the wood. My goal is to finish carving this coming weekend and to at least pull a proof. Since the original design felt hackneyed anyway I'm ditching it and am going to try to find something else. I know that the pattern will stay the same. What ever design I choose to make will still compact over the mountains and expand over the sun and sea in representation of water's changing states. I DID make my first attempt to change the bamboo sheath on my baren. That's another story for another day.......

Sunday, October 19, 2008

Farm People


I still haven't given up on the idea of festivals and mail art. One of the things I think might work for doing festivals is pedestrian type products that don't cost much and are easy to reproduce. Yay, printmaking! We are so applicable to such things! When I was a teenager, I LOVED comic books. My mom thought it was a waste of money but we didn't have life drawing in my rural area and those books really helped teach me anatomy. Anyways, fan art in popular comic zines came in the form of mail art. People would draw images on the flat side of a business envelope and write the address and postage on the seal flap. It was really neat to see what people would come up with. I began thinking that maybe customers would enjoy sending block prints like that through the post and that a series on prints on the envelopes would work well. I have a boat load of colored envelopes already and I began thinking of subject material that would be popular. Everybody loves animals and old engravings of animals are being ripped as public domain ALL the time. At first, I thought I would just do portraits of farm animals because it would work well in my conservative based market. Then, the idea of dressing the farm animals up in period clothing popped into my head. "Nah, don't do that. Just plain animals will sell better." I heard myself think. Well, screw that! I'm tired of ditching fun ideas over that. So, I went ahead with my idea for "Farm People" for my first series of mail art. I picked 10 of my favorite farm animals and will be dressing them up in 1920's attire. I'll be carving them onto blocks for a series of black ink open edition mail art envelopes. I will produce a limited edition of fine art prints as well for those who want something more archival (me included!).
My first specimen is the Work Horse. I just love his suspenders and hat! I armed myself with the Ultimate Horse book years ago and one of my favorite breeds is the Italian Heavy Draft. I like his conformation and the colors of the specimen in the book are very unique. Below is a scan of the image in the book. Not the best scan but it will do. :) Can't wait to start carving!

Tuesday, October 14, 2008

Billowing Clouds and Fluttering Waves


The key block is one of the most exciting yet scary blocks to carve. I feel like I'm moving a bit slow on this but I want everything to be perfect and that includes the concrete decisions I have to make, AH! The motto I'm sticking with is when in doubt leave in, reduction can always happen later if it is undesirable. I've been busy carving swirling waves and billowing clouds and have thoroughly enjoyed myself! Niddling away with my small u-gouge, the texture achieved in the clouds makes them feel like burgeoning puffs of whipped cream. (Can you tell I'm a foodie?)

This shot shows the mincing pattern I used with the waves. I also used the u-gouge for this. I hope that the uniformity of line with this tool will not detract from the over all design. This block will be used in two different editions. One will feature only one other color (red symbols) and the other will be a multi-block color version of the print. I know that there will most likely not be an issue with the multicolor edition but it nags at me for the black and white version. We'll see.

On the subject of nag, this job is KILLING my back!!! Obviously, the table is too low or the chair too high. Currently, this is the best place in the studio to carve right now. I have a lower chair but then my elbows are at level with my chin and that doesn't do anybody any good. I can't complain too much. At least I have a studio. :)

Sunday, October 5, 2008

Here Comes the Sun!


Yay! My shining sun came out better than I thought! I was going to free hand rays coming out of the sun orb but some how my original drawing left me with a lacking feeling. I had an old hemisphere ruler laying around and decided to get all technical. I hope it prints up as well as it appears to me. The precision almost gives me the feeling of a pattern for money but I think that the clouds, rain, and mountain will balance everything out and the technicality of it will not appear cold. Originally, I was going to have little "hooks" (thumbs) attached to the ends of the rays to mimic Egyptian mythology but I think I would be the only one who would get what was going on and, in this case, that was not my goal.

I got a little happy with the camera but "fly by" shots of one's woodblock are fun and the topography of the block give the impression of a planetary surface sometimes.

I've been informed by my sister's husband (who happens to be a cabinet maker) that poplar just so happens to be one of the worst woods for warping in VA and that it will even absorb moisture out of the air on a rainy day. These things I know to be true. Once, I did a large tree print and I did not put my block away properly. I left it on the printing table with no weight. It curled into an elbow macaroni shape! Yikes! I soaked it for five minutes in a bathtub for 5 or 10 minutes and then laid a towel beneath and above it. Then I piled a stack of flat wood on top of it and left it for a week. It did return to its original shape and retains it to this day. This little story was brought about because this block is made up of two separate planks of poplar glued and hammered together with nails. Even so, one end lines up flat and the other end has one of the planks bucking up about a sixteenth of an inch. I'm hoping that I can get around that but only proofing day will tell.
Lastly, when I first carved the opening in the middle the contrast between the two planks is striking. I like to think of it as my yin and yang showing up! It should be noted that these two planks were cut from the same board. Ah, variety!

Friday, September 26, 2008

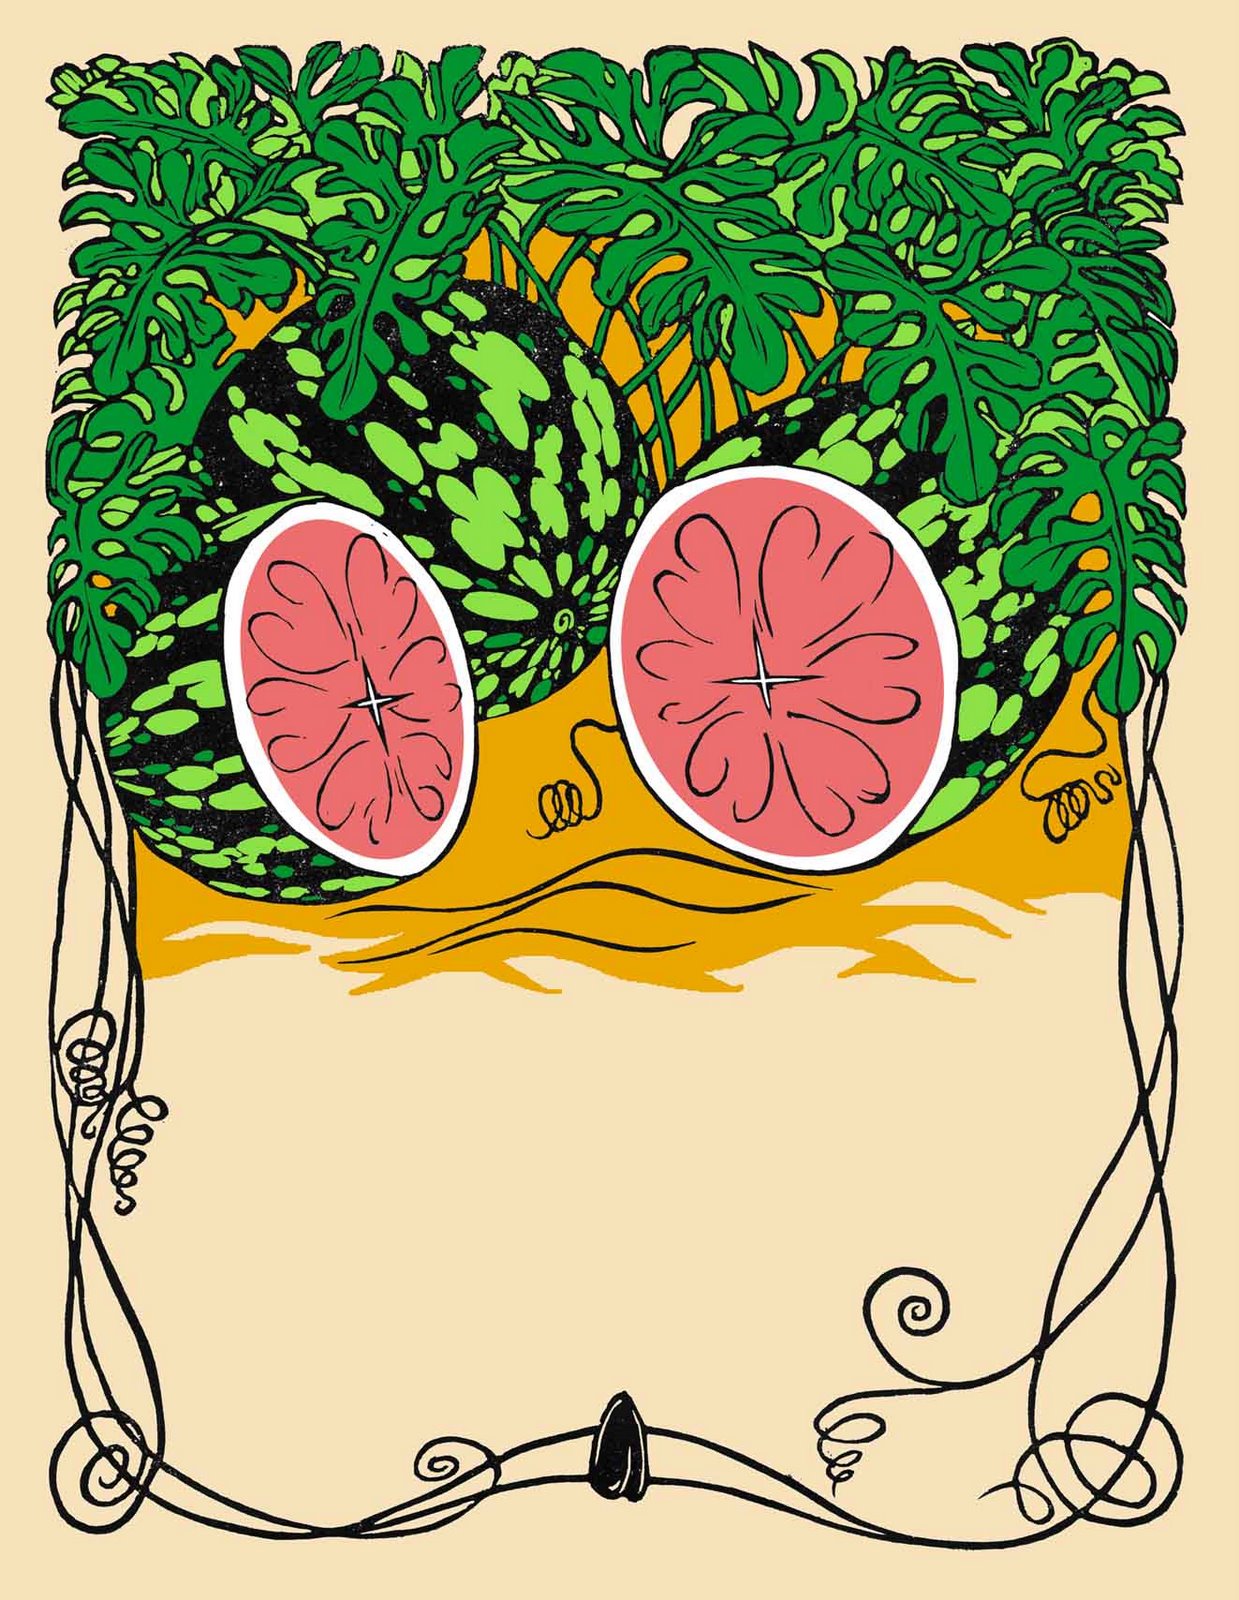
The Seedless Watermelon


I'm finally finished! I'll have to get a photo of it framed because I am in LOVE with the framing I did. I'll have to buy another frame for myself. I got a black mat and a very baroque black frame and with the black ink fines and swirls it looks great!
The piece will be hung in the Meals on Wheels Benefit Show at the McGuffey Art Center. It's quite funny. The stipulation for having work in the show is to have the work focus on food. Quite a few of the pieces have a dark bent to them. Mine deals with the loss of heritage due to apathy. Another piece focuses on the gluttony of meat. LOL! Well, I guess it's appropriate that we have it during Halloween!

Monday, August 11, 2008

Big Ole' Update O' Everything!


Of course, I love the design phase of printing! Drawing is at the root of my artistic abilities since I was 5 years old. That being said, I probably have a truck load of sketch books full of drawings that will never make it to an actual print. That's okay but I fear stagnation like none other! Having a looming deadline sure can horse whip you into getting a move on and not dally long on things. I know this project will take years but I want at least a few prints to show for it in July! When faced with things like this I'm a nervous wreck until I feel like I'm making significant progress. It's sort of like not being able to sleep the night before a big day. I am breathing a sigh of relief as I've finished constructing the key block for the Precipitation page. I feel at least now I'm on the road to success with block ready to carve!
I don't know if you would consider it upcycled but the wood is at least "reclaimed". I had a show in Fredricksburg VA a few years ago and I had constructed a long plank of poplar designed to be hung on the wall. The plan was to ink it up in black and then "white line" draw an image into the wood with my carving tools. The drawing itself would be sparse and in the end it was shelved in leu of better projects. I had already constructed the plank and it was a really nice piece of poplar. I knew humidity would be high and that the wood would most likely bend out of shape so I shore it up from behind with bars of poplar similar to stretchers on a canvas. It sat for a few years between sheets of protective styrofoam and then came to rest behind my sofa! Last weekend I pulled it out and we visited Mr. Miter saw and had a grand old time. My plan was to rip out the stretchers and reform them around the new planks. I did NOT remember that I had wood glued them on. I just went with it and bought two new end pieces to fit on the ends. Now, because I am employing a kento this block is far from "perfect." Mr. Miter saw didn't get everything straight but after some sanding, glue, and the end pieces things shouldn't move but so much.

In other news, I'm carving the color blocks for my Seedless Watermelon broadside. I proofed up the "sand" block in some ink I mixed up from Graphic Chemical. I was shocked at how close the color came out to what I wanted!

On the glass it almost had a greenish tinge to it. (When learning how to etch in zinc, we could curse the yellow as it would tinge to a muddy green when touching the zinc due to a chemical reaction between the metal and the ink.) As I mixed, I thought Oh well, I'll work on better ink later. This is only a proof. When it came off the press, the color was a pleasant surprise. I think my initial perceptions were an illusion from the glass and the cream paper gave it some warmth. The red of the melon is a different story.

Alizeran is the only red I have in oil based block ink (fixing that soon). It was so tacky it wouldn't pick up on the rollers. I added a hair too much easy wipe (easy to do when working with tiny quantities of ink) and the proof printed out a little splattery. At least the registration is in the ball park. Here they are lined up without the green.

I would say it was a productive studio day!

Thursday, August 7, 2008

Book of Life Update


Unfortunately, this image has all the charm of UFO or yeti shots. That's what you get when you try to photograph a 4H pencil drawing because it won't fit in the scanner. Anyway, I'm that much closer to beginning the carving on the first Book of Life page. Simply put, instead of the "Water Cycle" I think I'll call it precipitation. I am in love with the natural imagery itself and this picture definitely doesn't convey it but the band around it is supposed to represent H2O molecules reaction's to temperature. This reaction for the most part fuels precipitation. Close up (as long as the wood grain will allow me) I hope to be able to carve out enough detail so one will be able to count that the inner circle has 8 valence spots and that the smaller outer circles are covering 2 of those valence spots. We'll see. Here's the trouble. Having learned about the 4 major forces in the universe, it becomes a mute point to include those symbols because all four will ultimately be used in some way (weak force may be a challenge) and it becomes repedative. Convection is the ultimate drive. The two "ribbons" on either side of the sun indicate this. I'm not sure wether or not this is a successful tool though. To me, they seem to get in the way. I would welcome other opinions on this! Regardless, I must plug on. The 4 forces of the universe will definitely be addressed in their own print. There is rich inspiration there!

Sunday, August 3, 2008

Labradorite


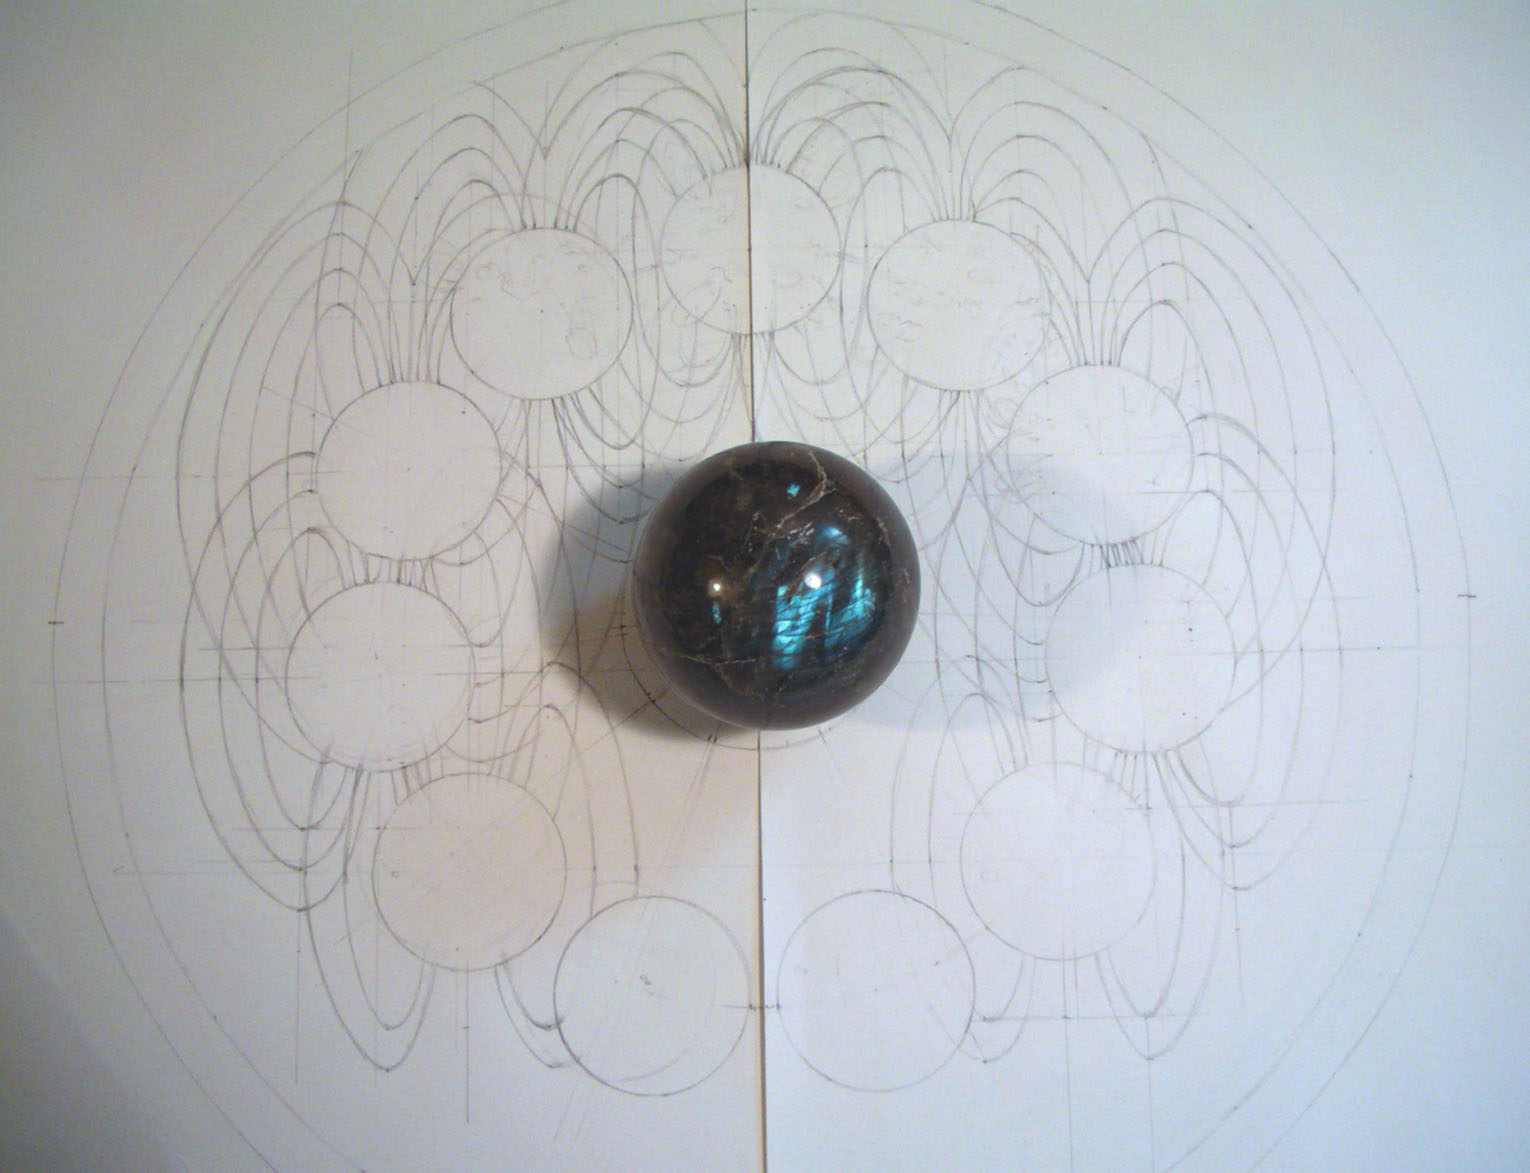
I am finishing the rough workings of the Solar Cycle page in the Book of Life. This page will be particularly complicated and I am also working on a painting in gouache to help me visualize what sort of blocks I will have to carve to make it work. The Precipitation page is fairly straight forward in that there is one key block that can have colors added to it later but for rendering space I want to use a series of nearly black purples and blues instead of just black. I have a feeling I'll need to carve a key block and just deconstruct from there. I was contemplating a straight black ink version of the Book of Life anyway to mimic the old medieval alchemists texts. I snapped a shot of the center stone that the entire book has been designed around and how it will lay in relation to the book. I plan to make (most likely have made :P ) a wooden book stand with the stone resting half sunk into the middle so that the pages will appear to orbit the stone as the turn. I purchased this labradorite orb from China. Labradorite is my favorite stone. The stone itself is unremarkable and most of the time a muddy hue and flecked with dark black flecks. An impatient person would regard it as an eye sore at first glance and continue on but those who lag behind to satisfy their curiosity are in for a treat. As the object is turned and rolled in the light, a flash of blue streaked with green erupts as if the essence of the universe itself is encapsulated within this sullied shell. Contemplating the orb by night helps one to imagine what dark matter must be like. Having this mineral as the center of my book will hopefully convey the fact that wondrous beauty can lie within those often overlooked.

Tuesday, July 29, 2008

Wazzermelonz!


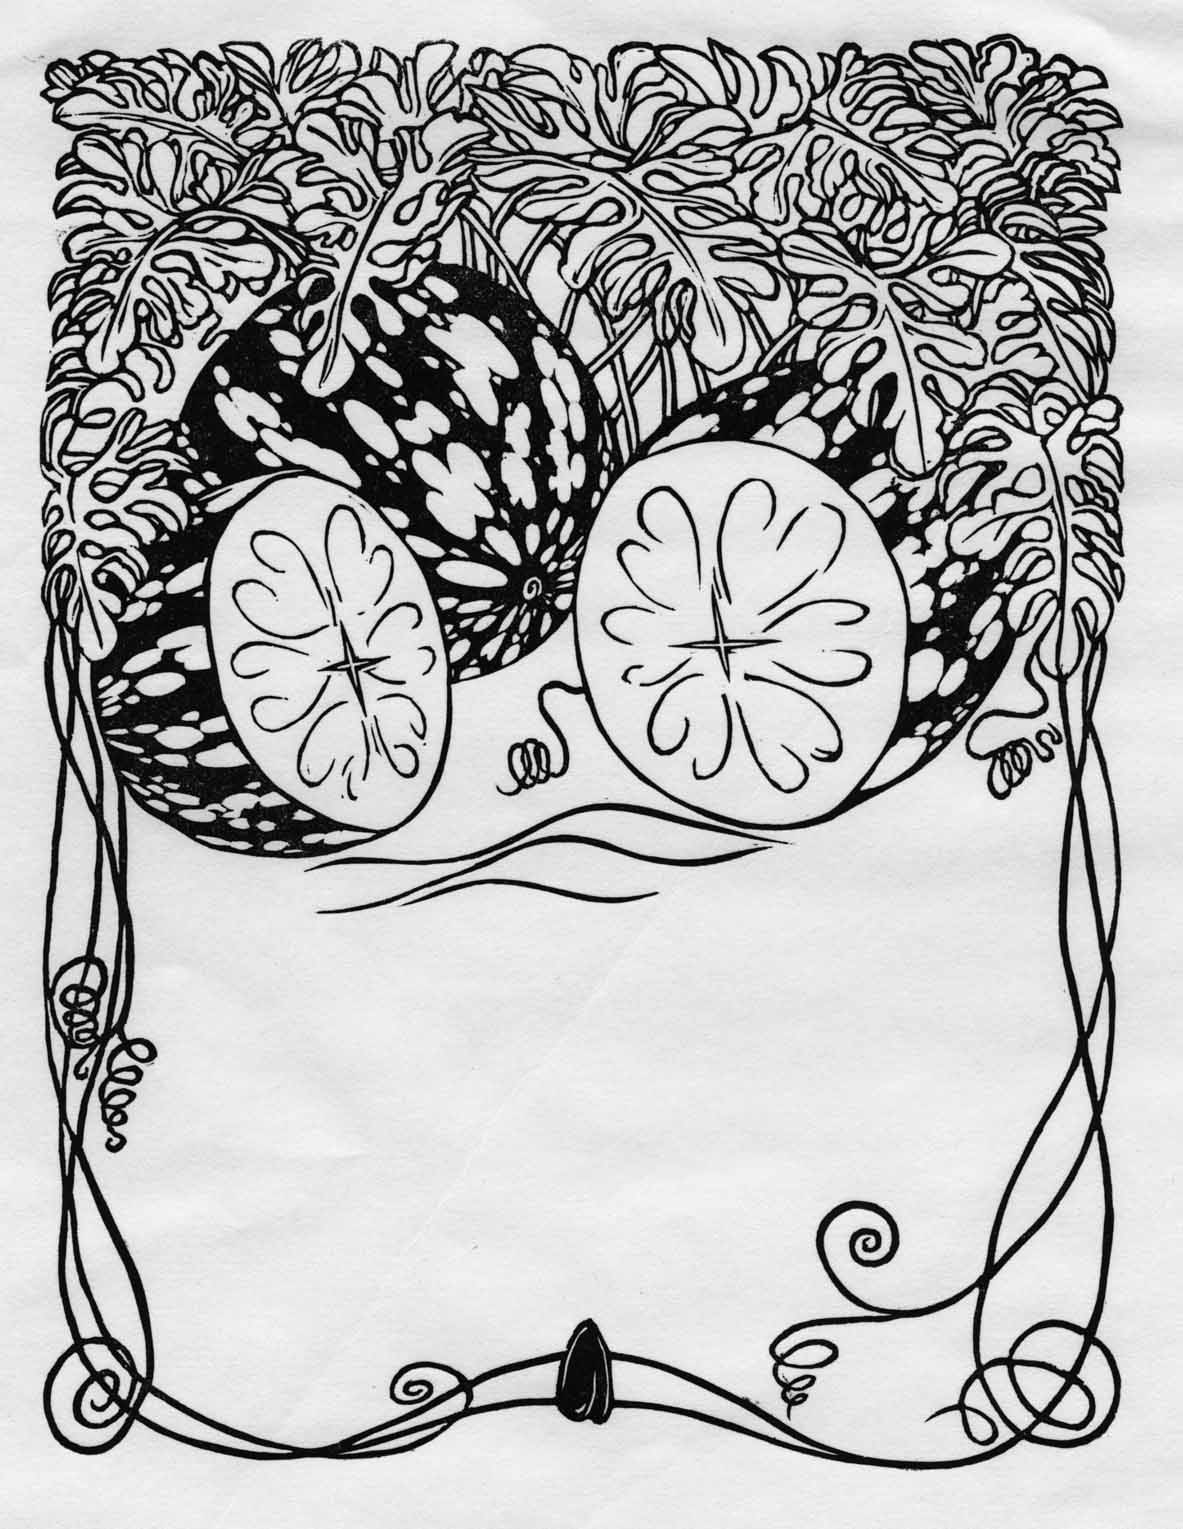
Here is a proof of my finished key block for "The Seedless Watermelon" broadside. I was without my camera when I finished in the studio so alas, I lack the pristine finished block shot. I just couldn't wait to see how it looked and proofed it up anyway. There is something so satisfying in that moment between just finishing a block and inking it up for the first run. I don't think Hinduism would be such a jump for a printmaker. (At least in my process) The printmaker labors over a drawing until achieving what he/she considers perfection and then stands back and says "Ah, what a beautiful work of form and art! A lovely drawing! But you are destined for another incarnation!" And so, the printer transcribes the beloved drawing to a block and labors over the object with his/her tools until achieving what is considered perfection and stands back. "Ah, what a beautiful sculpture! A lovely relief! But you are destined for another incarnation!" And so, the printer inks up the block and proceeds to print lovely images one after another. The printer says "Ah, what beautiful children! Go and be plentiful and share yourselves among the people!" That's my romantic spin on printmaking. Catch me next week ripping my hair out over registration or crappy ink. :)
Anyways, here is a rough coloring in photoshop that I did:

I plan on printing them up on Rives BFK Cream. I have a block ink that I purchased from Graphic Chemical called Antiquarian Black. I'm hoping it will print up really richly against the cream. The above is a grayscale image but it was pulled on Masa paper in Antiquarian Black and I think the icy white dampened any warmth that was in it.