Monday, December 28, 2009

Christmas Squid


So, the burner has been turned back on a lot of things while the world turns upside down like a snow globe over the holidays. Projects, thoughts, and obligations swirl madly around and I just wait in the middle for everything to fall into place on the ground. It's a waste of energy to try and run after them after all. We did end up with a white christmas that I'm very thankful for but is very hazardous to drive in. You can check out photos at www.journeytomiddleearth.blogspot.com.
I had started this series of three prints to add to my Limulus and Trilobites print to flesh out a show I'm slated to have in April along with Anne Cheeks and Robin *. I'm hoping to print up some Trilobites the first weekend in January but in the mean time I'm entertaining myself with this new project. I'm still having a little burn out with the Trilobite and Limulus project as it just feels like it's dragging on now but some of that is due in part to the "start/stop" aspect of it. I (like many other artists) like to see a project through and don't like stopping for things like day jobs, eating, sleeping....LOL, but that's life. Another reason I'll address next.

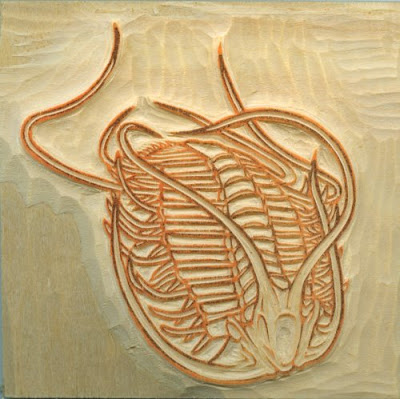
Here is the block for the first of three oil based prints I'll call the Bioluminescent Series. Firefly Squids put on a quite a show in Japan and I've always wanted to try the concept out in printmaking. I sketched out squids for a few days and I couldn't get the tentacles quite like I wanted them. Finally, I closed them up in an encasement as a squid does when it moves and for some reason that seemed best to me. Curious, considering I love writhing swirling tentacles. At any rate, the concept is to print at least three under print patterns of the squid body frame in a transparent white and then print a transparent base pattern of stippling to represent the photophors present in marine animals bioluminescent flesh. I would then dust these with an interferance blue so the viewer would be treated to a "schiller-like" experience as the squid lights up depending upon where you stand. I hope it works because I want to try this on an Octopus and a Trilobite also.
I brought my block to VABC Block Night and shared good carving and comradery. I must have been tired because I found carving the stipple to be exceedingly annoying. My friend Josef Beery had a great idea! He recommended filing a small tube of brass (found in model making shops, clever!) to a sharpness similar to my japanese carving knives. That way I could take a hammer and tap the stipples into my design and take my tiny chisel and chip away what doesn't belong. This was a great tip!.....and I didn't take it. I'll tell you why.
Having the disease of perfectionism is tedious but can be rewarding, however, you can also miss out on some happy accidents. The trilobite prints were starting to bore me because there isn't too much room to stray from the original design. Drawing them freehand was rewarding because I got to design how they were positioned but I still have to stay within the bounds of what the specific species design allowed. There weren't many deviations during carving either. Part of the reason that I fell in love with oil based woodblock prints were the little tailings that the carver sometimes "forgot" to take out. Those little bits of material that printed up and gave away the trail of the knife added an exciting energy to prints that otherwise would've seemed mundane. I decided to forgo the tedium of grinding a "tube blade" and forge ahead with my regular niddling fashion. The block sat for a week or two and then after work (on Christmas Day) a familiar notion began to creep up my soul and I felt like carving. I sat down to work on my squid and the stippling just seemed to flow out and around my knife. Here is a close up:

Notice the tiny little "tailings" that I've left in between the marker dots that will act as contracted photophors. If I had quested for "perfection", I would've been relegated to that one perfect shape of stipple that I think would've detracted from the piece. Now, not only do I have tiny photophors but also regular photophors that are organically shaped.

Don't worry, Josef. I'll still try your handmade tool idea some day anyway! Or, I challenge some one else to beat me to it!

Thursday, November 12, 2009

Epic Book of Draconic Struggle


So, there has been an extended absence of my presence on this blog as many things have come to pass this past month. I can't say that I didn't see it coming. I just wanted to deny that I was going down that road. When you decide that you are going to "be" an artist you should be under no delusions that you're instantly going to be awash with funds (from the sale of your work) or be instantly lauded by the general population. Nothing could be further from the truth. Art history should tell anyone that artisans live dramatic and sometimes abusive lives and only recently have been recognized as individual crafts persons instead of workers within a guild. Then why do we do it? I guess I'm straying from the point. I have moved out of my McGuffey studio and on to the next phase of life as an artist that I like to call hibernation. I think my presses have gotten the best out of this deal! They are free to romp and play with the other equipment at the Virginia Artist Book Center just a few blocks up the street from McGuffey. My house got the worst of it though as the other supplies and equipment are crammed floor to ceiling in our little log cabin in the woods. It's an appropriate enough place for an artist/psycho isn't it?....a little log cabin in the woods? Anyways, I know when I'm beat and sometimes you just have to roll over and cut your losses. Art isn't easy. It can be, but it's not right now. I couldn't hold down a studio and make a living but when my eyes started acting up again it was time to just let go. I'm often reminded of the monkey and the calabash story. African hunters cut a hole in dried calabash and put fruit in it to lure monkeys. The monkey will stick his hand in but can't draw out both his hand and the fruit. Every time, the hunters are able to catch and kill the monkey because he won't let go. So, this monkey is letting the fruit go! I work at a hospital now in an ICU so I see every day how life could be worse. As I was wading through the clutter of my studio accouterments I found a bag containing the supplies I had made for my journal concept. I thought maybe I could have fun and make money by designing journals with fantasy images that were dusted in metallic pigments. I finished the above book and called it the "Epic Book of Draconic Struggle" for fun. Yes, the weather is always good on my planet. Two asian dragons swirl in combat around an orb that constantly blows their flaming skin with rays of radiation. It's sort of a fantastical way of viewing the sun. I envisioned it also as being an echo of Yin and Yang. At any rate, my leaving my studio is just another slip down the trough. I know my jump to another crest is just around the corner.

Wednesday, September 16, 2009

Two More Swimmers for the Pool


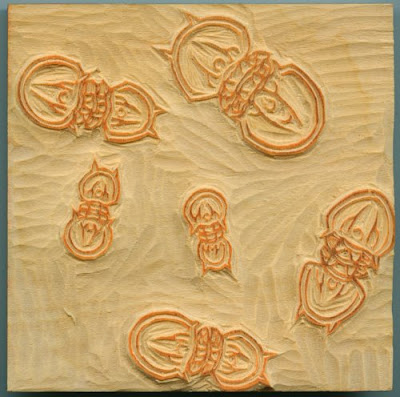
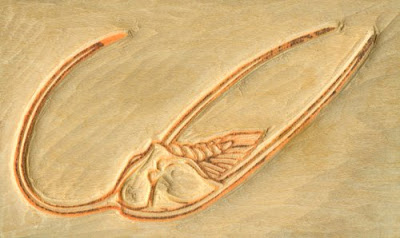
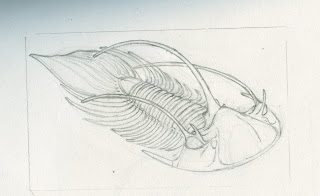
Two more little trilobites have come to join the block printing party. I uploaded the sketch of Kolithapeltis early (http://pistolespress.blogspot.com/2009/02/camera-crippled.html) on when I was designing the block images. Its head still looks like an old electrolux vacuum cleaner but the shape of its body continued to stick in my mind as I readied to carve. Something was not quite right and I couldn't put my finger on it. As I waded around the internet for photos of this animal I began to see that my haste to render the animals end as a soft fin like structure (as in a fish) was contorting its back spines out of proportion. From what I can guess the paddle-like end of the creature was probably more like a finger nail or the shells of soft shell crabs; flexible and soft but still tough and able to retain a solid shape. I retooled the image to make the back paddle take on more of a disk shape and it complimented the habit of its back spines much better. With its sweeping head spines it looks ready to zoom around the shallows like a prehistoric catfish!

Hollardrops reminds me of a little tank as its plates and spines were more on the thick side and less refined. I wanted to emphasize its back shell with its scalloped protrusions but I'm not sure that this pose achieved that. I had fun rendering the bulbous folds of its face, though, and I doubt that it will turn out to be a bad print.
I am so addicted to the way a block looks when freshly carved with its bright orange lines. I almost hate to put ink on it but I know that the rewards afterwards will be many! I can't wait to see how they print up!

Monday, August 3, 2009

Proofing Indigenous Ink


So, I worked with the ink I had made from the soil on our land for the first time today by proofing up the first five trilobites I had carved. My goal was to pull some proofs in the soil ink and be able to actually use those as well to make transfers for the color blocks. Well, it was a pleasant dream anyway.
It was a nice feeling anyways to begin printing with a pigment I had "made" myself. Even though I had poured off some water that had separated out in the jar when I initially ground the ink, there was a renewed skin of water on the slip and a strange orange red bloom of minerals suspended in it that I poured off before I began. Most of my suspensions are in alcohol and I mix/grind them myself from powdered pigment. This I left in water. In my regular suspensions, when I dip the spoon in to retrieve a bit of pigment, there is little resistance to the spoon and I often don't feel the pigment if the suspension is cloudy. It's not until I lift the spoon out does it become apparent that I have indeed scraped a lump of soft pigment that has fallen to the bottom of the jar. Titanium White (and all of its subsequent tinctures) is notorious for this.
When I dipped the spoon in for some pigment, the mud/water suspension had the resistance of hard jello. I could tell there was a lot of settled clay body in it. I spooned a bit out along with the nori paste and went to work warming up the block. Now, I had pestled this pigment through a fine sieve but not fine enough to take the granules of sand out. The pigment had the consistency of thick yogurt but I could tell there was a bit of sand in it. I have worries that I can only pull so many prints with this before the sand begins to wear down my carving! It is Shina after all. The ink itself prints up a light tan which is pleasantly warm and has only mild whispers of olive. Sadly, it clogs my fine detail and when I add more pigment vs. nori it only prints gummier. I thought back to the pestling stage of the pigment and remembered how the muck liked to wrap itself into a tightening ball form during the end stages of the work. This was disheartening to discover but I have a few more tricks up my sleeve. I washed everything and printed up the rest of the proofs in sumi and thankfully those proofs turned out fine. I'm going to try spreading out my mud pigment in the sun to dry and then grinding it to dust and the suspending it in alcohol to see how that does. I'm hoping that the process will destroy the organic element in there that I am guessing is causing the gumminess. I'm trying to make room for the nori to have its helpful gumminess. I'm also hoping that if that goes all that will be left will be the pigment and that it may print up darker as a concentration in an alcohol suspension. The drying process shouldn't take long as it IS July in VA.

As a last note, I'd like to announce how much I HATE Edgeworthia. Oh my god, I had Edgeworthia. I looked on the McClain's woodblock supply website and they stopped selling it due to its inability to stay consistent from one batch to the next. I'm going to use the Edgeworthia I have for the trilobite editions but I can see right now that this is going to be one massive headache on a large scale. I'm going to invest in a high quality washi for the Limulus. It deserves that much!
UPDATE: I actually had to "cook" the above image for it to come out right. My scanner seems to want to "fix" the image no matter how much I fiddle with the filters and settings. I think it may have something to do with Edgeworthia's gossamer qualities. I had to wash out this image in photo shop because it scanned up crisply with my scanner. I WISH it looked that way in real life but the resulting lack of contrast in this image is closer to what really printed up.

Monday, July 20, 2009

Cook'n up some Ink


Who wants to lick the bowl?
This weekend I set about making the ink I had planned for the Limulus print. I had scooped out some nice brown mud from the bottom of our hill and let it decompose in a jar in the sun for a few months. I was hoping that it would keep its nice chocolate brown color for this print but I am at the mercy of organic chemistry so we'll see what comes out. I had a large mason jar that I let sit out for a few months hoping to decompose any leaves and sticks that may be in there. It was gross when I rapped it on the porch. Gas bubbles from just under the surface of the mud would belch up and I was apprehensive about taking the lid off.
I was pleasantly surprised yesterday when I took the lid off and drained the top layer of water. I was expecting the smell to reek ungodly but there was no smell save an earthy must when you really stuck your nose in the jar.

All my utensils were lined up on the porch railing ready to go to work. The top layer of the mud was silty and still full of pine needles and bits of leaves. I ran it all through a sieve that I had purchased many moons ago for oil painting. It has been one of the best tools! After the top layer of silt came the grainier layers. I knew it was sand and gravel but the noise sounded like I was grinding glass shards into paste.

I know that much of the soil around my area is high in clay and even though there was a lot of glassy sounding sand and shards of stone in the mix, it all kept gluing itself together into rounded lumps as I spun the pestle against the sieve. I kept adding small amounts of water hoping to unlock the clay from the mass but it didn't seem to want to give. My efforts still yielded a large jar of silt that I hope will be suitable for printing but I worry about the amount of ink I will need to print my enormous wood block with. There was some mud still left in the bottom of the jar by the time I had filled my ink jar to the top so at least I have some reserve if I run low.

I couldn't have asked for a more perfect day to do this and my light green hydrangea tossed its new blooms happily in the breeze as I ground paste. It made me feel like I was a gourmet chef cooking a delectable meal for my most ardent fan. "Why yes ma'am. We use only the most fine ingredients and organic deer poop in this dish."
The final product really did have the consistency of watercolor paint. Here it is at the bottom of my mortar.

I noticed afterwards that the droplets of mud that accidentally got mashed over the side of the mortar kept their shape when they dried so I'm confident that there wasn't too much water and that there was plenty of pigment (clay) in the mix. I am worried though because they color dried out to be an ashy tan and I was really hoping for the retention of the chocolate color. I will not really know what to expect until I run proofs. I am hoping that the nori paste will help with some color retention. My faithful jam company Bonne Maman never fails me. I can't say that I'd buy strawberry jelly if it looked like that. Can you see the trilobites swimming and dancing around in there, waiting to come out?

Thursday, June 25, 2009

Lovely Spines


I’m still plugging away at the Trilobite lineage blocks. I’ve carved two more from the sketches I’ve made. Even though I’m not finished by a long shot there is something so gratifying about this stretch of the project. The massive block I did with the border and horseshoe crab in the middle was very tedious. In the beginning, the copper stars and DNA border seemed fun and challenging but by the end of its completion I was getting repetition sickness! The horseshoe crab was interesting but the jury is still out for me as to whether I should leave it be or try to keep working with the design. With the Trilobites I sketch the image to my liking, carve the block, and then I’m done and can move on to the next trilobite. There’s enough variety for it to continue to be fun.
This little guy featured above is from the Lichida family of Trilobites. His name is Boedaspis ensifer and his head reminds me of a vacuum cleaner. I had fun carving his whip-like extensions.

Here is Eoharpes and will probably be the only Harpetida Trilobite that I will do. The Harpetida family has a few other variants but not distinct enough for me to do more. They mostly all have the same wide helm-like face that reminds me of a Trojan warrior.

Tuesday, June 9, 2009

20 tiny trilobites


Say that ten times fast! For the second stretch of the Limulus print I have started the twenty some trilobite blocks that will make up the background around the Limulus. I purchased a "Grab Box" of Shina from McClains back when they were selling grab boxes. I think they only sell bags now so it was a while ago. I've been picking out pieces and trying to figure out how the little guys will fit. Most pieces are no more than about 4 inches on either side so I'm back to my minute pecking out. Actually, the DNA border with the copper stars on each corner required a lot of minute pecking. These will just feel more immediately gratifying because they can be finished within an hour or less. I just have to keep up with the drawings! I only have five drawings completed so far.

Shina is a soft plywood and though it is better than the wood I purchased for the key block there is still a danger of flaking when I get down to the teeny tiny details. I still chase these guys with the wood glue wash. These guys will have a color block for each of them in an aquamarine color so I also have to be careful not to cut the lines too thin or registration will be a small nightmare.

I like how the clearing marks in the background look like sand or water.

Sunday, June 7, 2009

Extended Absence


I must admit that I was shocked myself when I saw that my last update was in April and here it is June already. Several things have happened as of late and they have been steering my path across this rough water we call life.
I finally decided to proof up my Limulus block for better or for worse because a printer really can't decide what to change in the end until the print has been pulled. Here it is sitting on a table "warming up" with baths of water mist. Normally when I print I have a sheet or two of paper towel under a block to keep the moisture even on both sides so the block won't torque. This project is so big that I use a damp terri cloth towel to keep everything balanced. I proofed it up in bokuju but the final print will be a brown that I am working on made from soil in my indigenous area.

I found with this project that printing is quite a challenge. *Sigh* I purchased an enormous amount of Edgeworthia about 5 years ago before I learned that no, patrons do not turn out in droves to purchase woodblock prints (at least not my prints) and that no you shouldn't really print big editions until you begin to sell because then you have no money for new barens and brushes because you spent it all in paper. Lesson learned. Anyway, the edition is going to be printed on Edgeworthia which is admittedly not my most favorite of papers because for me it is very fussy. My friend Murray Whitehill was helping me and documenting with his camera as I printed. As you can see here, mutating into an octopus wouldn't be a bad idea as you can run out of hands and arms while trying to maneuver large sheets of wet paper. Murray produces really great photography and his most recent project is photographing artists as they work with a concentration on their hands. It's a great experience seeing all these hands in different media and it's become a game to me to try and figure out who the hands belong too! You can see more of Murray's work at www.MWhitehill.com and please do because he's got a lot of neat stuff!

Here is a proof coming off the block. I didn't get a whole lot of good ones because the Edgeworthia was too wet and wicking fibers all over the place. It's neat to see it coming off the block though. I am somewhat daunted by the fact that I will need registration for the next block as I have never printed this big and the bigger you go the harder it is to register finite detail.

Here is a proof of the Limulus block. I am resting my eyes a bit while I concentrate on creating and carving the family of trilobites that will surround the Limulus. I am a little dissatisfied with it but for negligible reasons. The boarder feels clunky to me but I know that it is fine because the proof is sloppy but the carving was tight and I am used to doing these small scale intricate carvings. It impresses me more when I view it from afar. Then it looks like all kinds of crazy detail. The other thing that bothers me is the shading of the Limulus. I feel like it still needs hatching but I am afraid to go any further. The wood will only allow so much before hatching turns into white area. I am telling myself that I can't make any changes until I'm finished carving the trilobites. Perhaps by that time the horseshoe crab will not appear so crude to me.

Monday, April 13, 2009

Dragon Books


Well, I have at least 7 books worth of book cover designs printed up and resting on my drying rack. This photo was tweaked a little bit in photoshop as one of my fluorescent lights on my drafting table washed the gold and burgundy hues out to a silvered gold against chocolate type pallet. This image is similar to what the real thing looks like. I didn't bother with the scanner as it usually doesn't do well with light reflecting metallics.
After I had measured out the pieces of paper to cut from one big sheet, I labored over the decision to draw a "registration panel" on the back of each one with a bone folder. As with all producers the question is whether or not such a step will interfere with the price of the final product. Will spending enough time to bone folder each and every print for registration really leave me with a comfortable feeling about pricing each book at $25.00? I finally decided that if I didn't do this step it would effect the price in that it would take me longer to measure each individual print after the fact. I was glad I did it because one set of papers was an eighth of an inch shorter than the rest. This would not effect the end quality of the book but it would be a beast to register during gluing. As with all handmades, the prints themselves jogged ever so slightly in registration due to the fact that registration guides were temporarily taped to the original papers instead of sacrificing an inch of paper. Having laid out my registration panels though made the job easier as now I only have to account for little adjustments lining up the papers for gluing to the boards. Binding will be another story all together. It is more a methodical practice, coptic binding. You simply sit down on the porch on a nice day or play your favorite album and commence sewing. I even think that maybe I will bring some unfinished ones to the market so that people will be able to watch me make the books. We'll see. There is also the matter of the stamp. I will be carving stamps to place on the inside of each first and last page as a sort of seal. The will be at least 3"X3" I hope.
I have been timidly going about the business of carving the Limulus itself. I am very afraid of screwing up the image after dealing so carefully with the detailed border. I found a few images of specimen Limulus that look like they've been shellacked to have a permanently wet looking surface. My goal was to generally carve out hunks of white highlights and then soften everything in with delicate hatching. As usual I got ahead of myself and did a bit of detailing in the shell.

I wasn't sure how the wood would hold up to the finite crosshatching but I had gone over it with a few glue washes and it has done surprisingly well.

At this stage I was unhappy with how it looked. I was thinking it was starting to look like half a vinyl record. I ignored such thoughts and pushed on. I finally carved out the entire shellfish and cut a few more hunks of highlight material out. Tomorrow I'm going to focus on more finite detailing and hopefully by this Saturday I may be able to pull a proof! I will be very excited at that prospect!

Sunday, April 5, 2009

Limulus emerging


Well, I am very much excited to have finished the DNA border on my Limulus print. I started this print in January and here spring is to usher me on to the final stages of this block! Today I cleared out much of the surrounding wood from the border and carved the perimeter of the Limulus' shell. You can see the myriad of wood used to construct this piece of plywood and each piece has been a pain in my ass. None the less they were each one a lesson learned. I'm going to be carving out the Limulus itself on Tuesday and I'm a bit nervous about that. The border was hard because there was so much detail and repetition that is was more of an exercise in endurance than anything else. The horseshoe crab I want to approach just right so that the intricate border is complimented by a skillfully executed subject. I will be referencing woodblock artists who have carved dark pieces but still conveyed depth. The border is mostly lines with some solid shapes but the horseshoe crab will be mostly solid shape with white lines conveying depth. Like I said.... I'm nervous!
Those two lung shaped pieces on either side of the Limulus' tail will stay. I am leaving those large pieces in to help support the damp paper when I go to print. I am hoping that this will also registration as the paper won't sag out of register as much with those extra supports. I have had the experience that when leaving such pieces, an errant pressure from the baren will leave a tell tale mark from the edge. I have gone over the edges with a sanding block so that the supports will hopefully not print up.
Finally, the block was christened today when I drove my shallow u-gouge into a cranky spot and busted a knuckle. You know a print will turn out good if it draws blood.

Saturday, March 28, 2009

You shall have your Proof!


I cracked up at Diana Moll's comment on my last post. She spurred me on to finish the block and pull a proof before I called it a night! The proof is definitely a proof. I purchased some burgandy/wine colored paper for the book covers but the gold dust is still the shade that I will be using. This chinese red color is just a piece I had laying around. The color is okay but way too obvious for me. I didn't want to use a bright red because the chinese dragons would imply a "chinese restaurant feel" to me. It's definitely firey!

Here is the block locked up on the press bed ready for a slathering of ink. I couldn't decide whether or not to use a tinted ink or just tint base. I have decided for the books to just go with tint base. The colored paper is so dark that it will not be necessary to use any of my pigments for a "back up color".

Here is the print fresh off the press. The sticky tint base really shows.

Now we get to play in the gold dust! Static in the air really carried the particles so I'll need to don a face mask when I get ready for the real deal.
Pretty good for a days work I would say. Now if you'll excuse me, I'm finding it hard to type as my vermouth spiked peach cider is inhibiting my typing capabilities! Going to go pass out in bed now and dream of dragons dancing in flames...

Tuesday, March 24, 2009

Two Dragons One Pearl


I started this little number while I carve the Limulus block. When I get tired of carving wood I begin to pluck linoleum and visa versa. This project is also a farmer's market venture. I LOVE books with beautiful covers depicting mysterious places and curious things and I am hoping that someone else will too. I have decided to design three book covers for journals that capture this enthusiasm and go further if the market allows. They will all be key block images that will be inked up in tint base and then dusted with gold or silver powder to create a gilded look. I have a deep red paper for this image and it will be dusted in gold. I'm also excited to use my Vandercook for this. I LOVE using my presses. This block image has given me some relief from the Limulus print as I'm starting to go stir crazy with the DNA and geometrical stars. The repetition is mind numbing and I have a feeling it has contributed to my recent clumsiness. The organic shapes of the twisting dragons with their snarling teeth and liquid flames and helped relieve my brain of the monotony in the Limulus border. I can't wait to finish it and proof it up!

Sunday, March 22, 2009

The Weasel will seek any way in....


Ah, the time honored tradition of artists seeking any means to subsidize their income....
Our local Farmer's Market in Charlottesville, VA is ready to start up in April and I would like to try to get in on it to experience what it is like! I learned a good deal from the "Holiday Market" that they held last this past winter on the downtown mall. Lesson number one: I hate cold weather. Lesson number two: People generally don't understand what a block print is or what printmaking entails. I didn't give the Holiday Market a fair try as I only sat for one day but sitting outside all day in the freezing cold on the advent of a snow storm with a total of two customers was not my idea of success. I am looking forward to the summer market though because I love sunshine and fresh vegetables! People didn't really know how to approach my stand with prints and framed works in the winter. They sort of treated it like a gallery and viewed the work and made comments but no real interest in sales. For this summer market I'm focusing only on "pedestrian" materials like journals, cards, and such. To begin with there will be only two products for sale just to see how things go. Those two products will be "Upcycled Cork Stamps" and "Hard Bound Journals".
I completed the display for some cork stamps that I made yesterday. It was so much fun to get this project together! I collect corks from bottles of wine that we drink over time and I had collected 28 before I really knew what I wanted to do with them. I designed a simple box template that I stamp my information on the front of and a sample image of the completed stamp on top. After I complete an image, I stamp it on the top of the box and in my "Stamp Morgue" book to record its existence and then wrap it in tissue paper and stuff it into the little box to await a new owner! I had made a small box full of them and could foresee that lining them up on a flat table was not my idea of successful display....especially if the wind kicked up. I sat down and sketched out a rudimentary design for a vertical display stand and set about assembling it out of odds and ends of foam core and cardboard that I had ferreted away over time. After much tweaking an adjusting, I covered the whole thing in glue soaked craft paper. The boxes fit perfect and reminded me a lot of old country store displays with their lithograph label boxes and sparkling bottles of tinctures! I had a cork stamp that I had carved a few months ago that I fell in love with and I set about stamping out little birds to paste all over the box so that it would still look good after the products were sold! I will also be bringing the stamp with me to show people what it looks like and how well they work. I made the sign out of different papers I liked and hand wrote the script. The sign detaches so that it will travel better. I will say that I just know that after sitting in the sun the nice bright colors will fade but at least I have a photo record of what it looked like. I hope that when I do get out there that I will see all those little birds I pasted onto the display by the time I leave!

Wednesday, March 18, 2009

On and on...


Yep, still chipp'n away at the horse shoe crab block. I think I got a little "factory fever" with the repetitive carving of the stars and DNA patterns. Before I knew it, I had screwed up major bad. I was habitually plowing through the end section of the longer side of one of the DNA strands and went right into my star pattern without realizing what I was doing. Lesson: If you're tired, stop carving. Anyway, I don't know why I tried to fill in such a large hole with wood filler but I did. I knew as I locked the studio door that night that it was a stupid idea. I even lay awake that night thinking that it wouldn't work and I was just going to have to go in and fix it. Yes, I lay awake and think about these things. Anyway, I came in and made this plug for the wound. I admit I initially tried to carve into the filler and it crumbled just as I anticipated. Normally, a plug would be wedged into the shaped hole in a block and then leveled off but because this is a piece of shit plywood board I had to hand carve and sand a small plug of shina plywood. It actually worked great (or so I think until I proof it up!). By the way, I tried out a new brand of wood filler, Elmer's, instead of Dap. Yeah, that stuff is crap. It just doesn't haven't the body I'm looking for so I guess I'll be heading into the hardware store to get more Dap.

Using crap wood is always an interesting adventure. In one of the Kirin blocks, I was carving along and found area of glitter plastered in between the layers of plywood. Here is a curious stain at the top of the block. It was probably a marker of some sort as the wood made its way to lamination. Some areas are just a straight up pain in the ass:

This is a rather large strip of black striations in a layer of the plywood. The wood gets tough and brittle in these areas and I find I have to hone the knives more frequently than usual. That white patch is the wood filler that had to be plastered into an area that just wasn't there at all. Holes are always a pain. Water can get in and spread who knows where in your image to create rot or the pressure from printing can even cause "sink holes" in your image.

Lastly, when an area is "finished" I brush on some watered down wood glue to shore up the weak wood. I'm beginning to wonder if this is the best idea as it will affect the absorption of water during the printing process but I really have no choice. If I don't do something to shore up all the detail, I feel that the block will degrade before I even finish pulling color proofs. Either way, there is more than one way to skin a cat. If it refuses to print moku hanga style, I have a can of oil based ink and a brayer at the ready!

Saturday, February 14, 2009

Got a camera now!


Yay! The cable finally came and I was able to download the images I have been snapping in the studio. This is a foreshortened view of the DNA border I have chosen for my Limulus print. I believe the entire length is just under 40" and was probably the hardest part of the border to carve. The intricate star was easier for some reason.

The repetition is enough to make you go cross eyed. I'm hoping my next print of this size will be easier as the board is a lot more organic.

Here is a close up of the kento. I am afraid that it is too close and that I may have to have a smaller brush just for inking that part but that was the limit of my paper so my options are limited as well. There are 14 points on the star and there are 14 electrons in the last naturally occurring valence shell in an atom. Copper is missing 3 of these electrons and this illustrated by the dark shading in three of the spokes on the star. DNA would appear to emanate from two of each spoke to create a boarder around the Limulus. This is my attempt at symbolizing that Limulus blood contains copper and that copper atoms and Limulus DNA share a relationship that maintains the animal. I am in love with Islamic tile work and geometric patterns and I took inspiration from this to create the stained glass looking star. I am also in the process of creating a painting to go with this series.

Lastly, here is my cheap answer to my back issue. Leaning over and carving on this thing can be a real bitch. The box helps a little (until I have to move the block) and the handle on the make shift table I'm using is good as a sort of bench hook. The table is really actually a massive wooden box. I'm guessing it used to ship munitions or maybe lighting equipment or something but these days it stores my paper and acts as my carving/printing station.

Tuesday, February 10, 2009

The Year of the Ox


I hope I don't ruin it for anyone but I had to post an image of my Year of the Ox Exchange block. I had done two sketches but couldn't decide which one to do. I had a design with a musk ox but last minute I had a gut inclination to go with my Nandi sketch. Nandi is the name of the white Brahman Bull that Shiva rides. Nandi means "joyful."
I grew up helping my father with our beef cattle and I have an affinity for livestock. When we would go out to feed the cows it was fun to see the calves jumping and skipping in the field and when the feed came out the cows would jump and skip too as they raced to our truck. It was rare to see the bull jump or skip because he pretty much just shoved where he wanted to go so I guess he didn't get much excited about anything.... except a cow in heat maybe. Anyways, The god Nandi just seemed perfect for the Year of the Ox because we need an excuse to be joyful and because I just love Brahman cattle. I love that hump and the droopy ears! I wanted a dynamic pose and I'm wondering now if I didn't just end up doing a Schlitz malt liquor ad.
I would later like to do a few color blocks but now time is of the essence so I'll pick out a color other than black and get them bulls a moving so they can joyfully skip off to their new homes!

Wednesday, February 4, 2009

Camera Crippled!

This whole not having a camera around to document what I'm doing is driving me nuts! Poor little camera wants so bad to take a picture but alas his little mechanism is broken so he just clicks and clicks photos of black. My mom did what all moms do and is insisting that I use HER camera in its place... except for the fact that she has no idea where the USB cable ran off too. She just pops the memory card into her printer slot. We tried that but for some reason it won't register in my husbands printer and I just don't feel like playing network tag every time I want to blog. Luckily, seedy New Jersey is there for me and a hot little USB cable is on it's way to me from Ebay. Anyways, I REALLY REALLY REALLY want to update you guys on the Limulus block because it's turning out nicely but alas we must await the arrival of the cable.

Although my camera is out of commission, my scanner is not! I have a total of 22 drawings to complete for stage two of the Limulus print (whew!) and I am learning things about trilobites that I didn't think I would even need to but soak up I shall! (I have since learned that my rendering of trilobite legs in my future watercolor is all wrong AND I need to add two antennae!) Above is an example of creature from the Corynexochida family. It looks more like your "average" trilobite except for the half moon fused shell on his rump. It's kind of like the curvature of an old WWII American soldier helmet.

Through most of my drawing trilobites I notice that a face shield is what comes natural when rendering these animals. This is guy from the Harpetida family is pretty much all helmet! I would usually find a lot of varieties within the families and only choosing two from each is hard but pretty much all the members in this family look like this which is probably the reason this will be the only Harpetida member you will find in the final Limulus print. Something about the shape reminds me of a Trojan helmet.

Remember WWII Helmet Butt? Yeah, this is a distant cousin from the same family. This seems to be the "catfish" in the family. Its wide angle face spread out like an old vacuum cleaner and three prominent whiskers leaning back over it. The rump has shrunk and grown a feathery tail feather that shifts with the currents of the waters.
Zach asked me what kind of wood the Limulus print would be and what kind of ink I was going to use. I think the label at Home Depot said "Cheap ass shit you ought to know better than to buy but you're broke as a joke so buy it anyway". Seriously, I have no idea (don't remember!) but it sure carves crappily. I have to constantly be aware of the grain and the finished places receive a total of three wood glue washes if not more just to shore everything up. I took a proof on a different carving that I'm using the same wood with and it seems to print okay so I'm just crossing my fingers!
About the ink, it's going to be printed Moku Hanga style and I'm going to try using ink made from dirt from my back yard and ashes from my sister's wood stove to make a chocolate colored ink. It will be interesting because my dirt is a heavy iron oxide. I need a hot day to cook out the microorganisms and so far that isn't happening so we'll see.